This is a guest post from my teaching partner Chantelle Davies. We are working collaboratively to explore tools and resources and how we can make better use of them in the upcoming term. The post is focuses on photo editing apps how to use them in the classroom. With her expertise and knowledge I hope how to learn to use these apps in our "Recorders of Learning" task. Thank you Chantelle for you expertise and leadership.


The past year I started to explore the world of classroom blogging for the first time. Because I was still learning how to make the most of this great idea, while at the same time learning a new grade, and exploring other 21st Century tools for the first time; the blogging did not evolve into all that I had hoped it would be. As you may know, my teaching partner, Ray Swinarchin and I are working through a collaboration of teacher inquiry process this year, revolving around how to better integrate 21st Century learning tool into our lessons. I refuse to give up on blogging as I have come to believe it is such a valuable tool for learning and teaching. I am going to tackle it again and Ray has decided to join me for the ride.
Last year my blog became a great place for homework to be posted, for students to share summaries of what they were reading, and the occasional post (through shared writing lessons) on a topic we were learning. This year I WILL do more with it. Since Ray and I want our blogs to encourage more interaction and collaboration among students, we are brainstorming ways to do that without creating a tremendous amount of extra work (meaning time) required by us. Ray and I have come up with a few ideas, but for the purposes of today's post I'm gong to tell you about our plan for The Weekly Recorders of Learning.
We will have two students be responsible for this role each week. Together they will be given a few minutes each day to record a few notes to remind them of the key ideas that they learned that day. We will also allow them to take photos to document lessons and their learning that they can then use at the end of the week to aid them in writing a blog post about what the class learned over the week. In order to make the most of these photos, we are going to teach them to use a few of the photo apps we have available to us on our class Ipads.
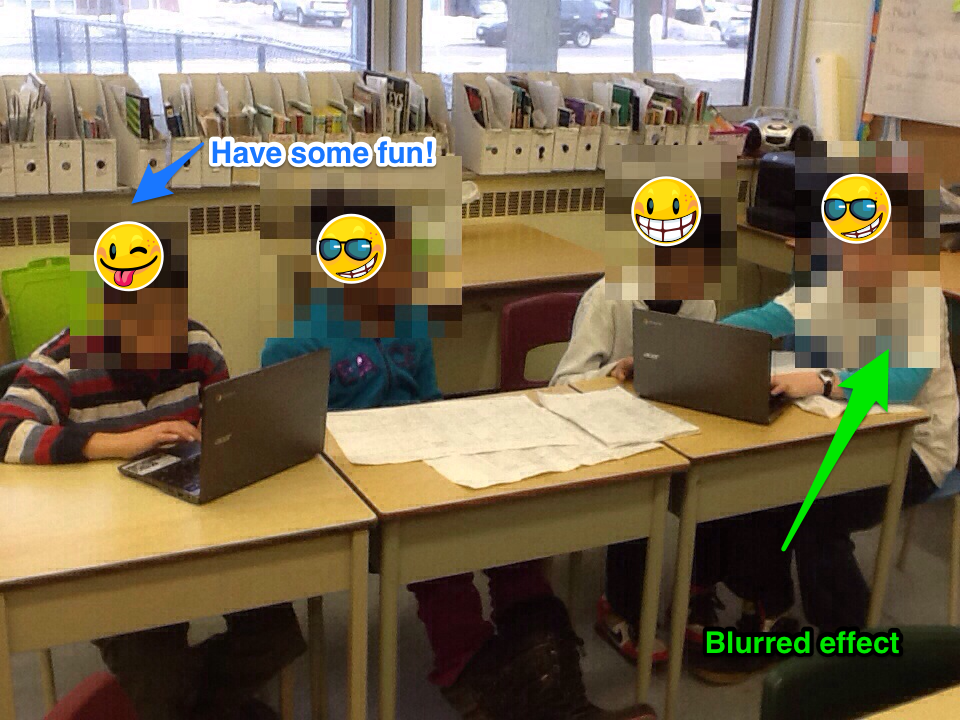
 The first of these apps that I came to love last year, was Skitch. Skitch is an app that allows you to take any photo, screenshot, webpage, or map and draw on it or write on it. As a teacher the feature I came to love most about Skitch was the ability to blur out sections of a photo. Although most of my student's parents were okay with them blogging, a few families did not want their child's photo published on the blog. Skitch allowed me to continue publishing shots of students in my class, while not scrapping the whole photo because one of the students photos could not be posted online. This year we will teach our student the ins and outs of using Skitch so that when they are composing their blog posts for Recorders of Learning, the student can use the features such as arrows, boxes, writing text, etc. to annotate their photos and highlight the key feature that show the learning the are reflecting on.
 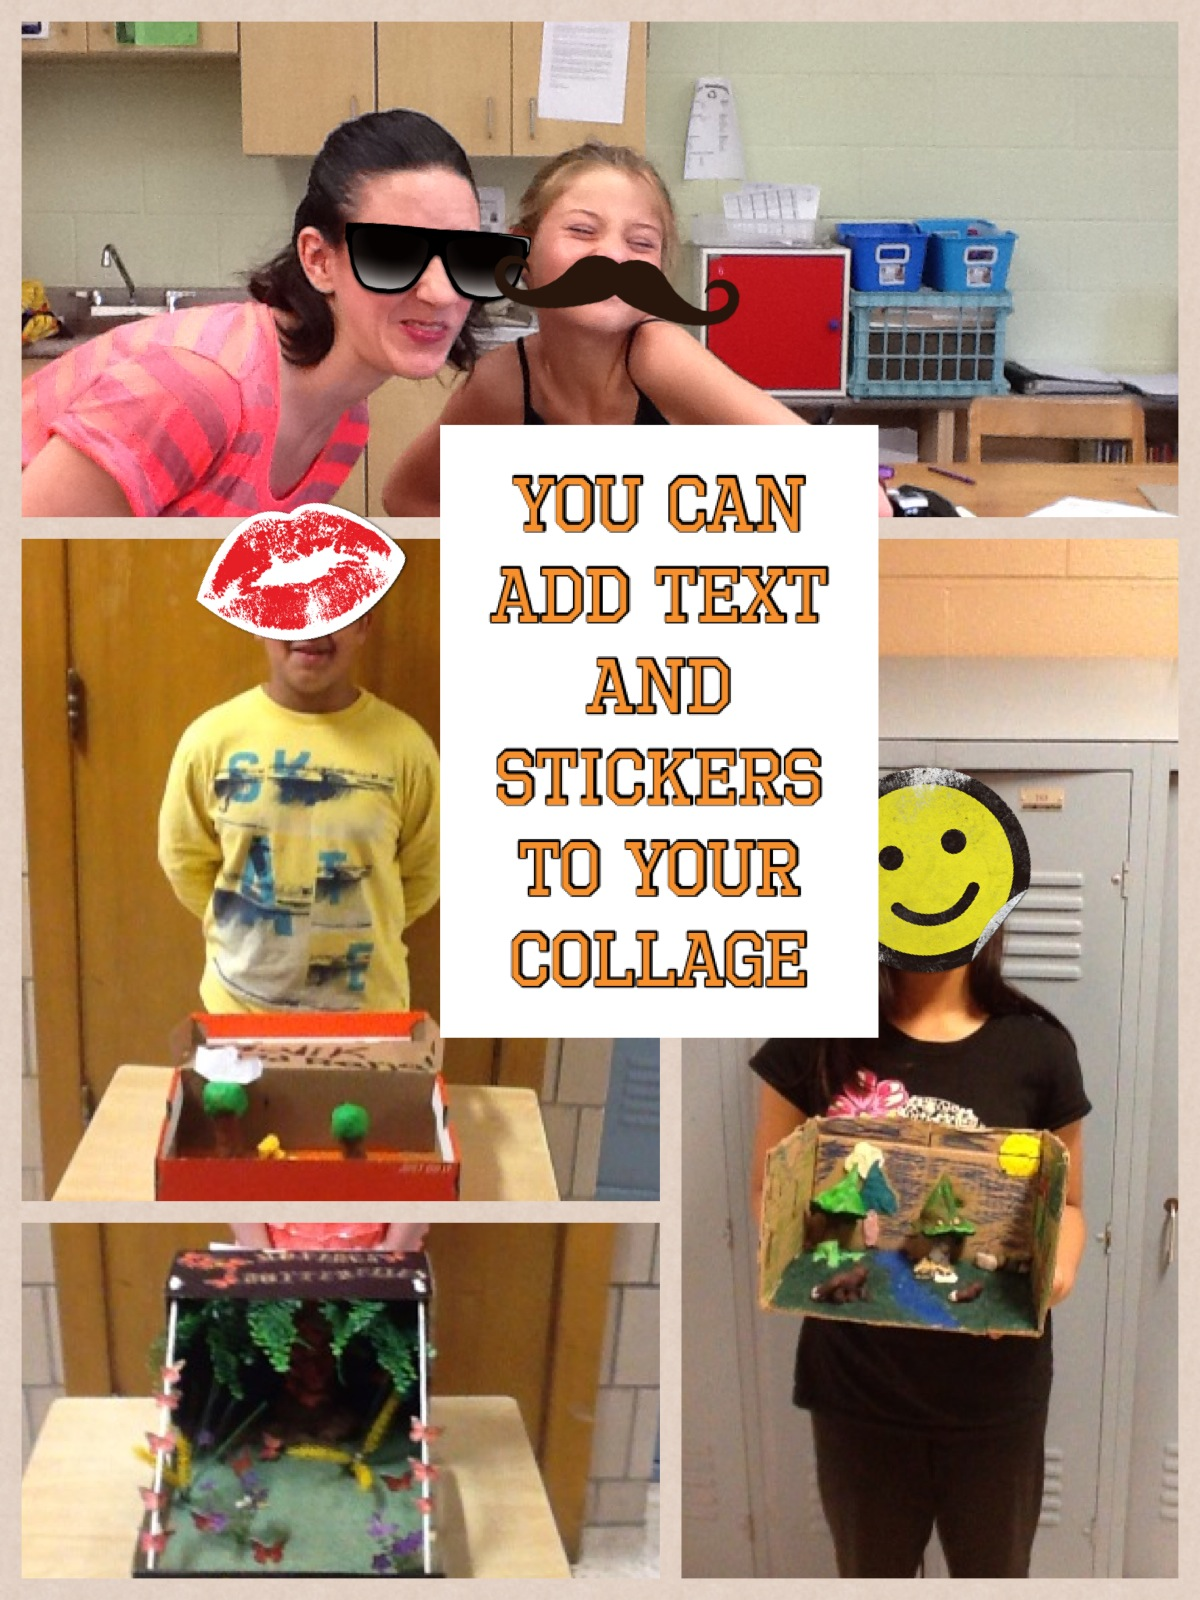 In addition to Skitch, we are going to introduce Pic Collage app. Simply put, this is an app that will alow the students to take multiple photos and group them into a collage. Pic Collage allows you to add text over the images and has some fun stickers the students can play around with. It does not offer not offer the blurring or arrows that Skitch does, so we often use them in tandem.
  The third photo app that we are exploring is Snapseed. Snapseed is new to both of us and we'll have to see if it's worth the time teaching this tool in addition to Skitch and Pic Collage. My concern is that students might spend too much time playing with their photos and not enough time completing the task. Snapseed allows you to play with effects on a photo, adjusting things like brightness, contrast, blur strength, etc. You can also change the look of your photo through special effects tools like red-eye reduction, cropping, and straightening. I like all of the options for this app, but even I got caught up in playing around with the different looks I could achieve. It may be distracting for some of our students.
Either way, each of these photo editing apps is sure to engage our students this year. It's also a great learning experience to add to our blog lessons because blogs without images are boring!
Chantelle and I wondering if you have any other Ipad apps that are easy to use (kid friendly) and useful for classroom blogging?

